
Fibaro is a manufacturer that we know well here, since we tested their first home automation box in 2012, for which I also did the French translation :p The Polish manufacturer was bought in 2018 by the company Nice, leader in gate and roller shutter motors. This acquisition thus gave birth to a new home automation box, under the name Yubii Home. Still operating with the Zwave protocol, it also hosts the Nice radio protocol, thus allowing all the automations to be controlled natively. I suggest you discover it in more detail.
Unpacking the Yubii Home home automation box
For this test I received the Yubii Home home automation box, accompanied by two Zwave peripherals.

Inside, we discover the box, simply accompanied by a power supply, a USB cable, and instructions.

The box itself is very sleek and discreet, in a white plastic case, with a ribbed top. A single LED indicator is displayed on the front to signal its proper operation. An indicator whose intensity will be adjustable in the box settings, if you want something very discreet. This small box will therefore go unnoticed even in a living room.

To give you an idea of its dimensions: it measures only 17.5 cm long by 11 cm deep, by 2.5 cm high. Very compact, therefore!

The bottom is black, and includes a label with the default identifiers for the first connection. But above all, it has 4 small rubber feet to prevent the box from slipping when it is placed on a piece of furniture, as well as two holes if you want to fix it to the wall.

The back is just as clean, with just the micro USB port for power, and two buttons to restart or reset the box. No fuss! And no Ethernet port either, the box will therefore connect via Wifi, which will ultimately allow it to be positioned anywhere in the home, as long as there is a power outlet or a USB port to power the box.


We feel that the manufacturer wanted a home automation box for the general public, easy to install, and with a design that is not scary. WAF validated :)
But despite this simplistic aspect, this box contains a Zwave Plus controller (700 series), as well as 433 and 868Mhz communication to communicate with Nice equipment. In addition to the 2.4Ghz Wifi of course.
For the tests I also received two Zwave Plus devices: a connected socket and a motion detector, also acting as a temperature and brightness sensor.

Those who have been following the blog for a long time will easily recognize these devices, which we talked about extensively at the time of Fibaro. They are the same, simply under the Nice banner today.

That's it for the tour of the owner! So let's move on without delay to its installation and use…
Using the Yubii Home home automation box
The initial configuration is done by connecting directly to the box with a computer, by connecting to the Wifi network generated by the Yubii Home box. It will indeed be necessary to do the first configuration and update before being able to use it with the mobile application.
Once connected to the Wifi network of the box, we enter its IP address in the web browser, as indicated on the back of the box.

The system then gives us the choice of the Zwave engine. If we believe the message, V2 is no longer maintained, so here I opt directly for V3, still in beta, but which will be called upon to evolve.

Then you have to indicate the Wifi network that the box must join, so that it is easily accessible.

You also indicate its geographical location: this will be useful in particular to determine the sunrise and sunset times, very practical in scenarios.

You set the location parameters, to define in particular the date format, the use of commas or periods, etc.

Then you define the password for the administrator account, as well as an email address, useful for recovering the password in case of forgetfulness.

All that remains is the configuration of remote access. This is not necessary, the box can operate completely autonomously. Experts can always define a redirection address for access from outside. But if you don't want to bother, you can simply use the Fibaro Cloud service, which is perfectly secure and allows you to access your box from anywhere, without having to configure anything on your router. The simple solution!

To do this, you will simply need to create a Fibaro account and associate your Yubii Home home automation box with it.

And that's it! The installation itself is really not complicated, you just need to follow the few steps of the wizard to get started quietly.

Using the Yubii Home home automation box
Once the initial configuration is complete, you access the control screen of the home automation box. Rather empty at the moment, which is quite normal, since we have not created any equipment there.

Those who are familiar with the Fibaro Home Center 3, or even the Home Center Lite, will recognize the interface without problem: it is identical. In fact, this box is an HC Lite to which we have added support for Nice protocols in addition to Zwave!
At the top right are several icons, which indicate the alarm status, the number of people connected, notifications, any available updates, the home mode, etc. Very practical shortcuts to use!
Here we start by updating the box with the latest version.

From this moment on, only the box will be usable with the mobile application.
But for the rest of the configuration we will stay for the moment on the web interface, which I personally find more practical for this phase.
Adding the first devices
Once the box is up to date, we start by creating sections and rooms to organize our house. The sections can be the floors or the large parts of the house. We can imagine creating a ground floor, a floor, a garden, etc.

Once the sections are created, we can add rooms to them. We give it a name, we place it in a section, and we can assign it an icon for a nicer graphic representation.

Here is my configuration for the example:

Once the rooms are created, it is time to add our first devices, via the settings / devices screen of the interface:

Here we have the choice between Zwave devices, Nice, Elero (the high-end brand of rolling shutters and Nice sun protection), and “other devices”, which we will come back to later.

Here we ask to add our Zwave devices. For those who know this protocol, the operation is always the same: we ask to add a device, the box goes into pairing mode, and waits to detect the devices to add.

In the case of Fibaro / Nice Zwave devices, you have to press their button 3 times to activate them.

The Zwave devices are then detected and added to the Zwave network.

Here we find our connected socket:

And our motion detector, which also acts as a temperature and brightness sensor. We also find its different properties:

We can then give them a name and place them in a room to organize our connected home.

We then find our devices on the dashboard of the Yubii Home box:

As well as in the room in which they are assigned. We have a clear display, which indicates all the necessary information, as well as the battery level if the device is running on battery:

Not being equipped with Nice or Elero automation, I was not able to test this part. On the other hand, it is very interesting to see that it is possible to add other devices than Zwave / Nice / Elero devices. The Zwave catalog is now very vast, and we are not limited here to Fibaro or Nice devices in Zwave: most other manufacturers are also supported, because Zwave complies with a well-established unified standard. But via the “other devices” section, it is possible to add many other devices: cameras, thermostats, etc.
In addition to all these choices, there is a


marketplace where it is possible to download various plugins to install devices or features. Be careful, however, to check the compatibility with the Yubii Home box, because some plugins developed for the “old” Fibaro HC2 are not always compatible.

But this opens up many possibilities. I was thus able to add my Philips Hue lights:
After an initial scan, all the lights are automatically added to the box


Or by configuring them completely manually:

In short, the possibilities for adding hardware are quite substantial, since the manufacturer announces compatibility with more than 3,500 devices. You really shouldn't hesitate to search this marketplace section.

Automations
Controlling your entire home with a click in a mobile application is good, but the goal of home automation is to automate it, to make it “intelligent”, and no longer think about it. And in this area the Yubii Home box offers many possibilities.
First of all, the management of housing modes, very practical! By default the system offers 4 modes: present, absent, vacation, and night. On this screen it is possible to determine the status of all the devices in the home according to the state of the home. For example, in absent mode, you can make sure to automatically turn off all the lights, turn off unnecessary devices, close the shutters, and activate the alarm. With one click, when we put the house in “away” mode, all these devices will be cut off and the shutters closed. Conversely, by putting the house in “present” mode, we could make sure to open the shutters if it is still daylight, and reactivate the necessary devices. This is a very simple automation, but very practical in daily life.
Then comes the possibility of creating our own scenarios, which will be triggered manually, at a given time, or according to various triggers. The system offers a few default scenarios, such as the “morning” scenario which can be used to automatically open the shutters at sunrise and turn on the coffee maker.

We can give a name, select an icon, and adjust various parameters:

We can then apply the scenario to a set of devices, for example to all the shutters, if we want to open them all at sunrise in the morning:

But Yubii Home offers two other types of scenarios: in the form of blocks to assemble, or Lua code.


The block mode is very similar to what can be done with scratch, for those who know this development system. We have blocks on the right, which we just have to drag to the left, in the box we want. Here I have for example created two conditions: the days of the week, from Monday to Friday, and another condition based on the sunrise time. As is, the scenario will launch automatically from Monday to Friday at the time the sun rises. A time calculated by the system in relation to our geographical position, and which changes throughout the year with the seasons. I then dragged two actions right next to it: turning on a connected socket, and sending a notification to inform me.

In this way, we can create fairly complete, even complex, scenarios, but via a very intuitive interface to use.

Finally, the last type of scenario is for advanced users, since it uses the LUA programming language. Here it is possible to go very very far in the conditions, calculations and actions to trigger. But you have to master this language:
A little tip: you can create the bulk of the scenario with the blocks, then ask to convert the scenario created into LUA. The system then does the conversion by itself, and all that remains is to refine the few parameters that you want to modify in the code ;-)

Control panels

The Yubii Home box also offers a system of “panels”. These are screens with dedicated functions.
For example, we have the alarm panel, which allows you to define the peripherals to use in the alarm system (door opening detectors, motion detectors, etc.), the delays for entering / exiting, etc.
Scenarios can then be triggered automatically in the event of an alert. We find the same system as for the scenarios seen previously:

With in particular the system of blocks to be placed as desired:

The system of course includes an integrated keyboard to disarm the alarm, so that it is not accessible to just anyone. The code is defined directly on each user:

Another panel allows you to manage the temperature of the house, via a thermostat system, according to a calendar and the current house mode.

I was not able to test this part, due to lack of compatible equipment on hand, especially since here I heat with wood :) But the heating management promises to be very complete, using thermostats or thermostatic valves for example, with the possibility of switching to manual when desired:

Another panel dedicated this time to the garden, in particular for automatic watering, where it is possible to define the days and times of activation:

Finally, the Energy panel, which is undoubtedly one of the most interesting, especially in these times when energy is expensive.

A settings section allows you to define the different rates and schedules of our electricity supplier:
While another tab allows you to define the measuring devices to use, for monitoring the consumption of the house, but also for monitoring production if you are equipped with solar panels or wind turbines for example:

You can then follow your electricity consumption in detail by the hour, day, month, etc. and this globally for housing, but also room by room.

A third tab in the energy table even gives us an overview of our impact on ecology!


The other parameters

The Yubii Home box also contains many other settings. Admittedly used less often, but which are always useful to mention. It is thus possible to activate automatic backups, locally or on the Cloud, which can always be practical in the event of a failure of the home automation box. This avoids having to reconfigure your entire home.
We will note in passing the indication on the available peripherals and scenarios:

We are indeed here on a version similar to the Home Center Lite from Fibaro, limited in power and memory (ARM Cortex A7 900Mhz with 512MB of Ram), which necessarily limits the possibilities. The Yubii Home is thus capable of supporting around forty Zwave peripherals, around forty Nice / Elero peripherals, and around forty scenarios, which will be enough for most homes. Be careful, however, of the limitation of plugins (5) and supported cameras (only one!). The marketplace certainly opens up many possibilities in terms of compatibility, but its use will remain limited due to the power of the box.

It is also possible to monitor its performance in the diagnostic section, with nice graphs on the processor, memory, and storage:
Finally, for advanced users, it will be possible to closely monitor the quality of the Zwave network:


As well as the possibility of updating certain compatible devices:


The Nice / Elero section also offers to adjust certain communication parameters if necessary:

Control your home automation with your finger and

eye voice As mentioned above, it is possible to control all your home automation via a mobile application, also available on tablets, which can allow you to put a tablet on the wall with all the controls of the house for the most geeky ;-)
We find the favorite devices and scenarios on the home page:
And it is possible to control all the elements of the home very easily: shutters, lights, alarm, etc.

In short, the mobile application is rather pleasant to use and is intuitive.


But the Yubii Home is also compatible with Google, Alexa and Siri voice assistants. You will therefore be able to control all your home automation by voice without any problem!
Conclusion
Fibaro has built a solid reputation over the last ten years with its home automation boxes and its Zwave peripherals. Here we find all the know-how of the Polish manufacturer, in a complete and versatile home automation box, since if it is primarily aimed at the general public, it will also meet the needs of slightly more advanced users, thanks to its different types of scenarios, its LUA scripts, as well as its marketplace allowing to extend its possibilities. The acquisition by Nice has also allowed the addition of the automation manufacturer's protocols, thus facilitating the control of gates, garage doors or shutters of this brand. And I know that for many, this simple argument is already enough in itself to adopt this box! Generally sold under the 160€ mark, it is also a very affordable solution.
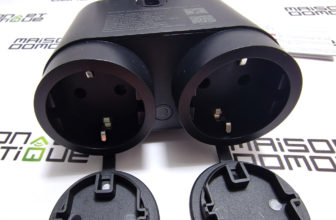
Note that the manufacturer offers a very practical device: a
mobile access point with integrated battery . All you have to do is insert a Sim card with a Data subscription inside, and connect the Yubii Home box to it in this way:This small box is therefore inserted between the home automation box and its power supply. It provides double security: in the event of an internet outage at home, the Yubii box can switch to the Wifi network of this access point, which will provide an internet connection thanks to its Sim card. Control of the house therefore remains possible. But it also ensures an autonomy of around 12 hours in the event of a power outage, thanks to a built-in 5000mAh battery! A perfect companion for the home automation box, therefore! We will talk about it in more detail in a future test, because by its operation, this small box can come to the rescue of many other solutions, home automation or not ;-)


Please remain courteous: a hello and a thank you cost nothing! We're here to exchange ideas in a constructive way. Trolls will be deleted.