As you know, I've been using Starlink for nine months now for my internet connection, which has changed my life. I'm also slowly migrating my home automation system to Home Assistant, which offers numerous device integrations. One of them allows you to integrate Starlink into Home Assistant, including retrieving the system status and connection quality, allowing you to trigger scenarios or notifications accordingly if desired. Setup isn't very difficult, but there are a few subtleties, especially if the Starlink router is in bypass mode. My Network Configuration First, a quick update on my network configuration, as setting up this integration may vary from one installation to another.
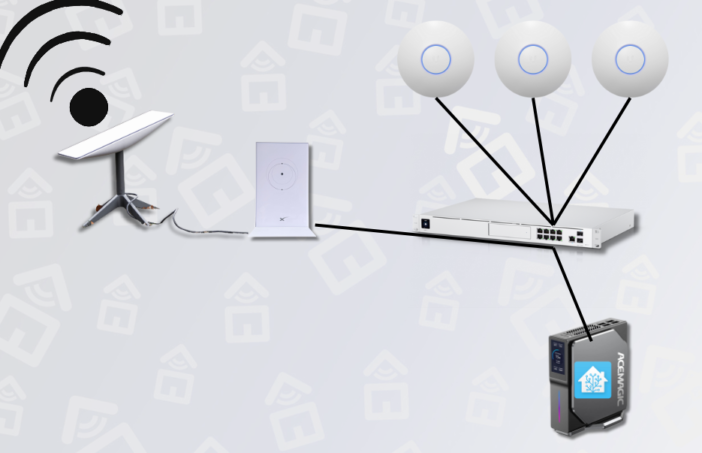
I have a Starlink antenna for the satellite internet connection, connected to its router (v2 in my case). This is plugged into the official Ethernet adapter. The Starlink router is configured in bypass mode because it's connected to a Unifi UDM Pro router, which manages the entire network. The Starlink router is simply too limited for that.
Router Configuration
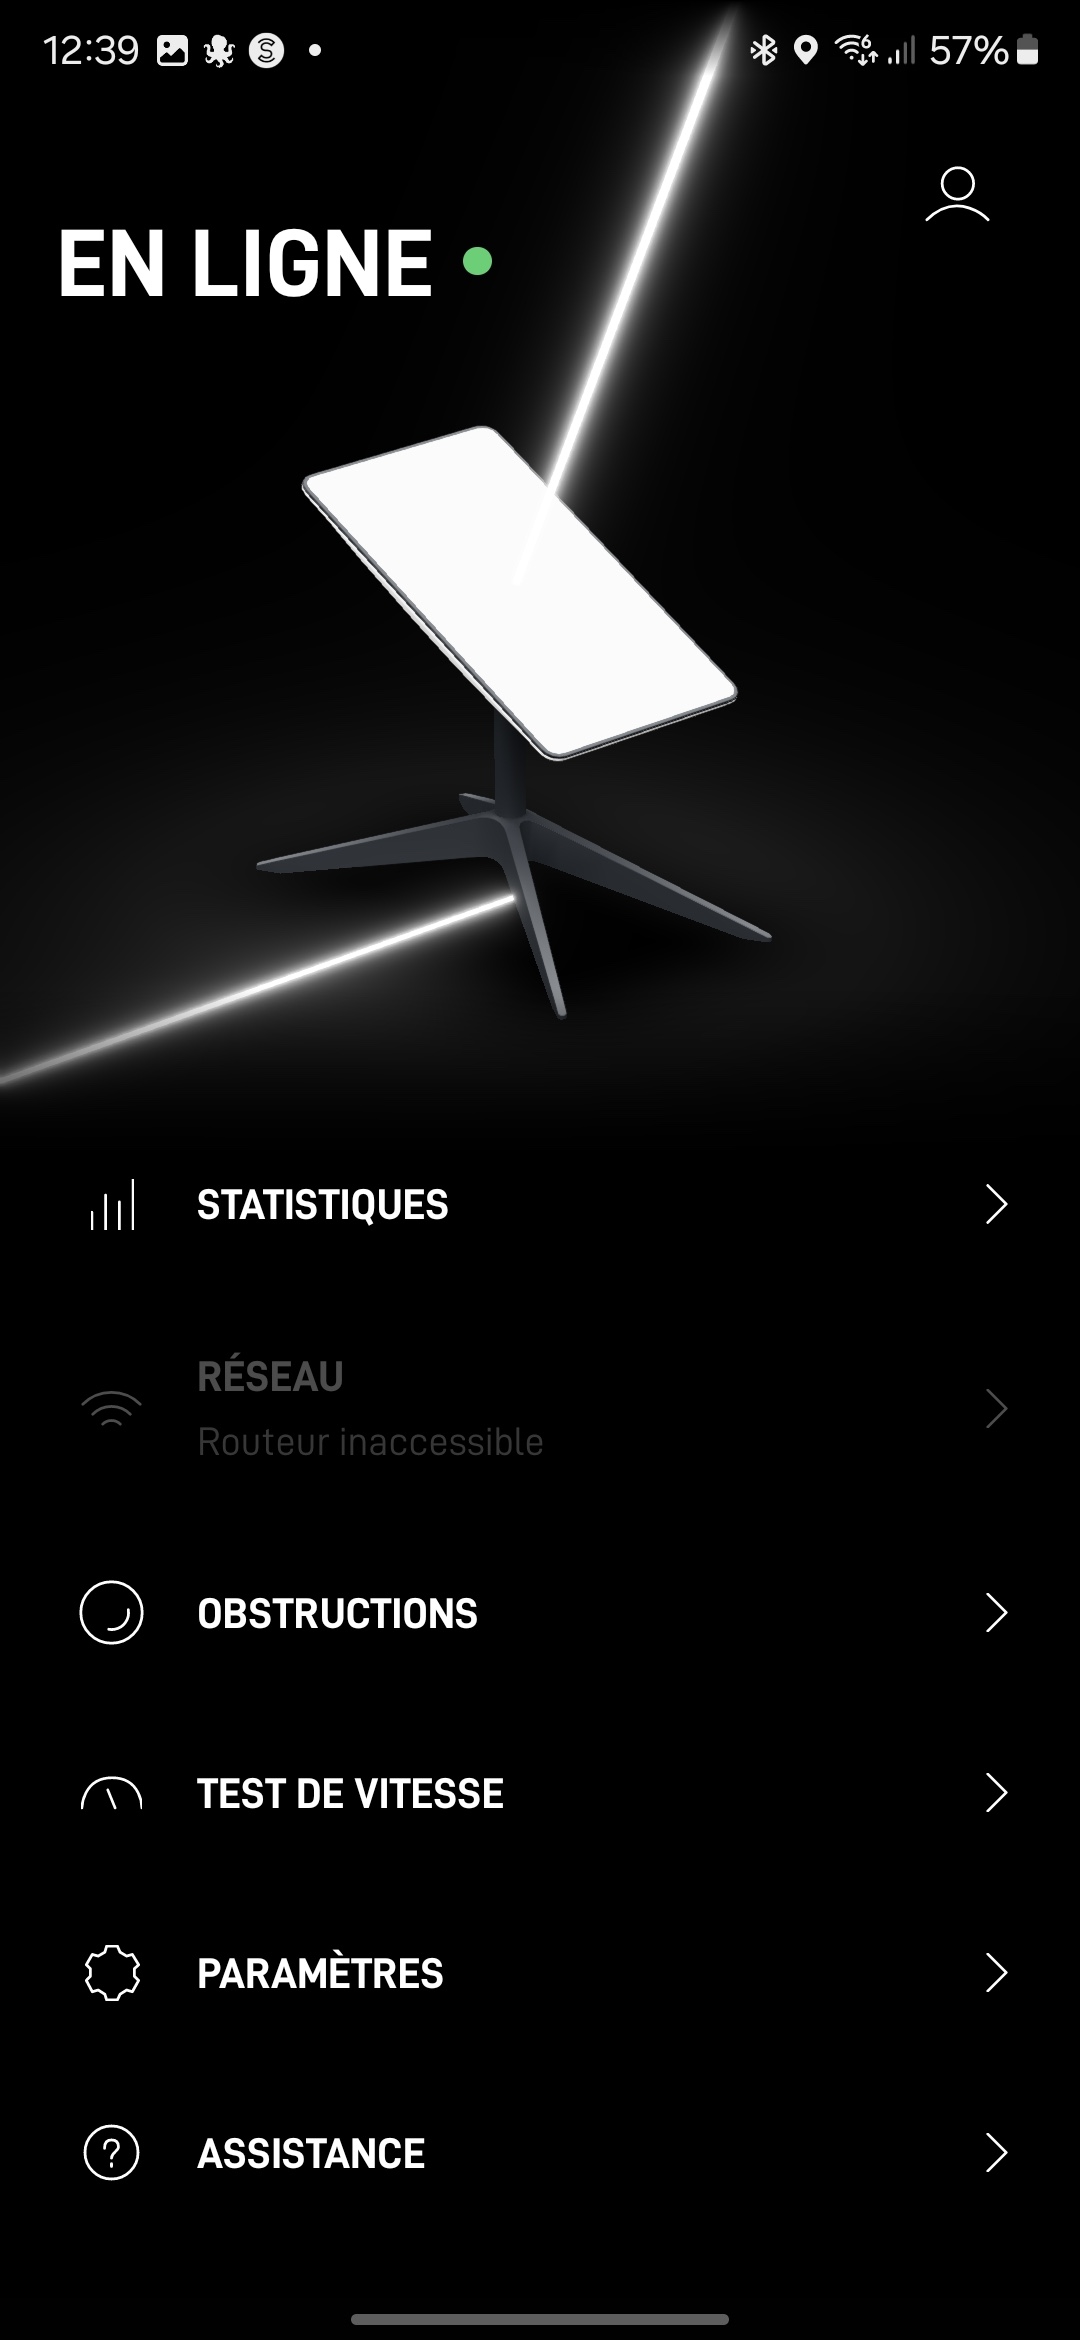
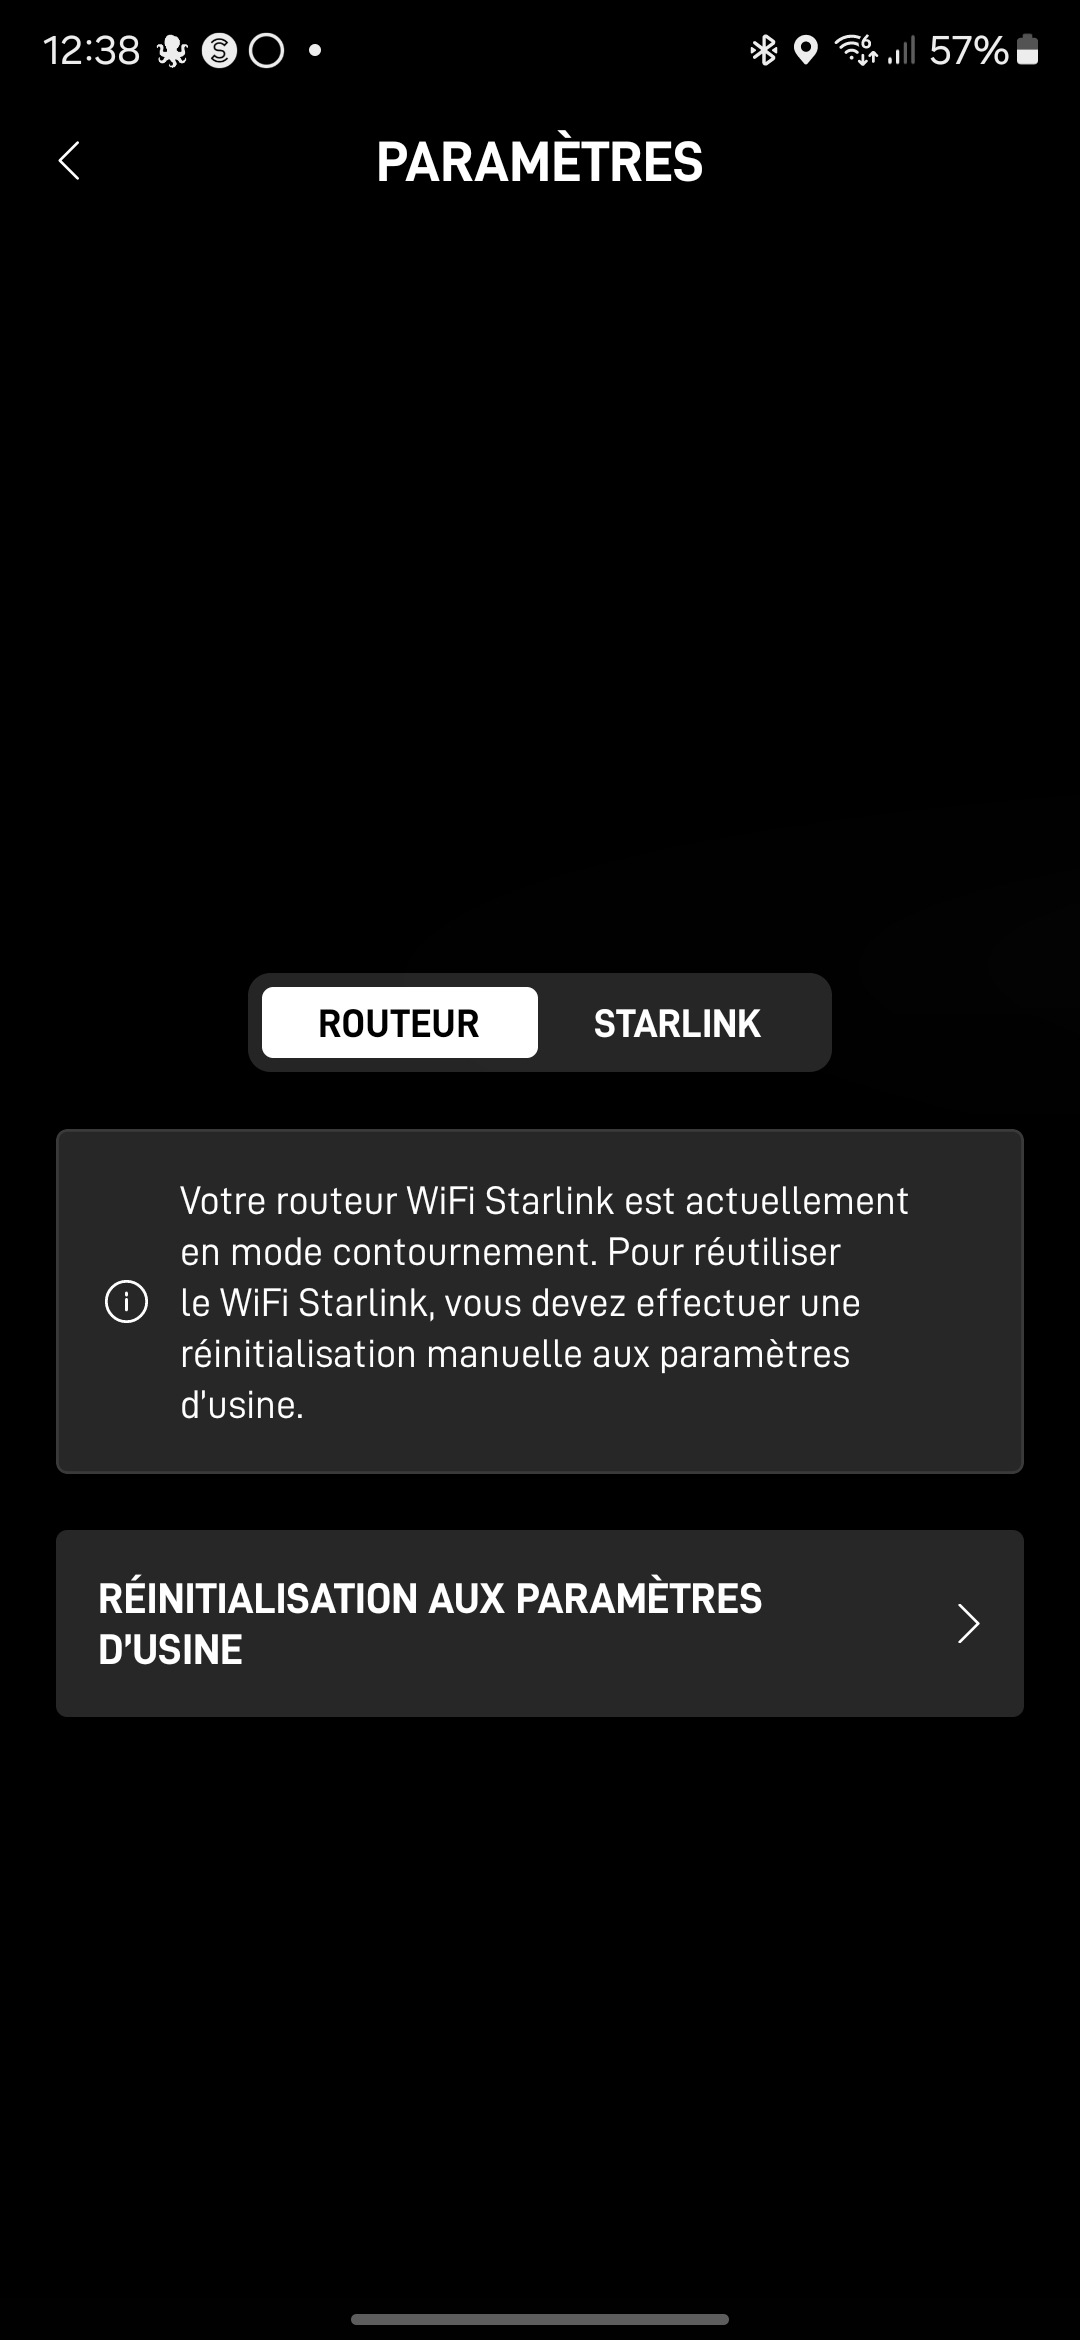
The Starlink router is therefore configured in bypass mode:
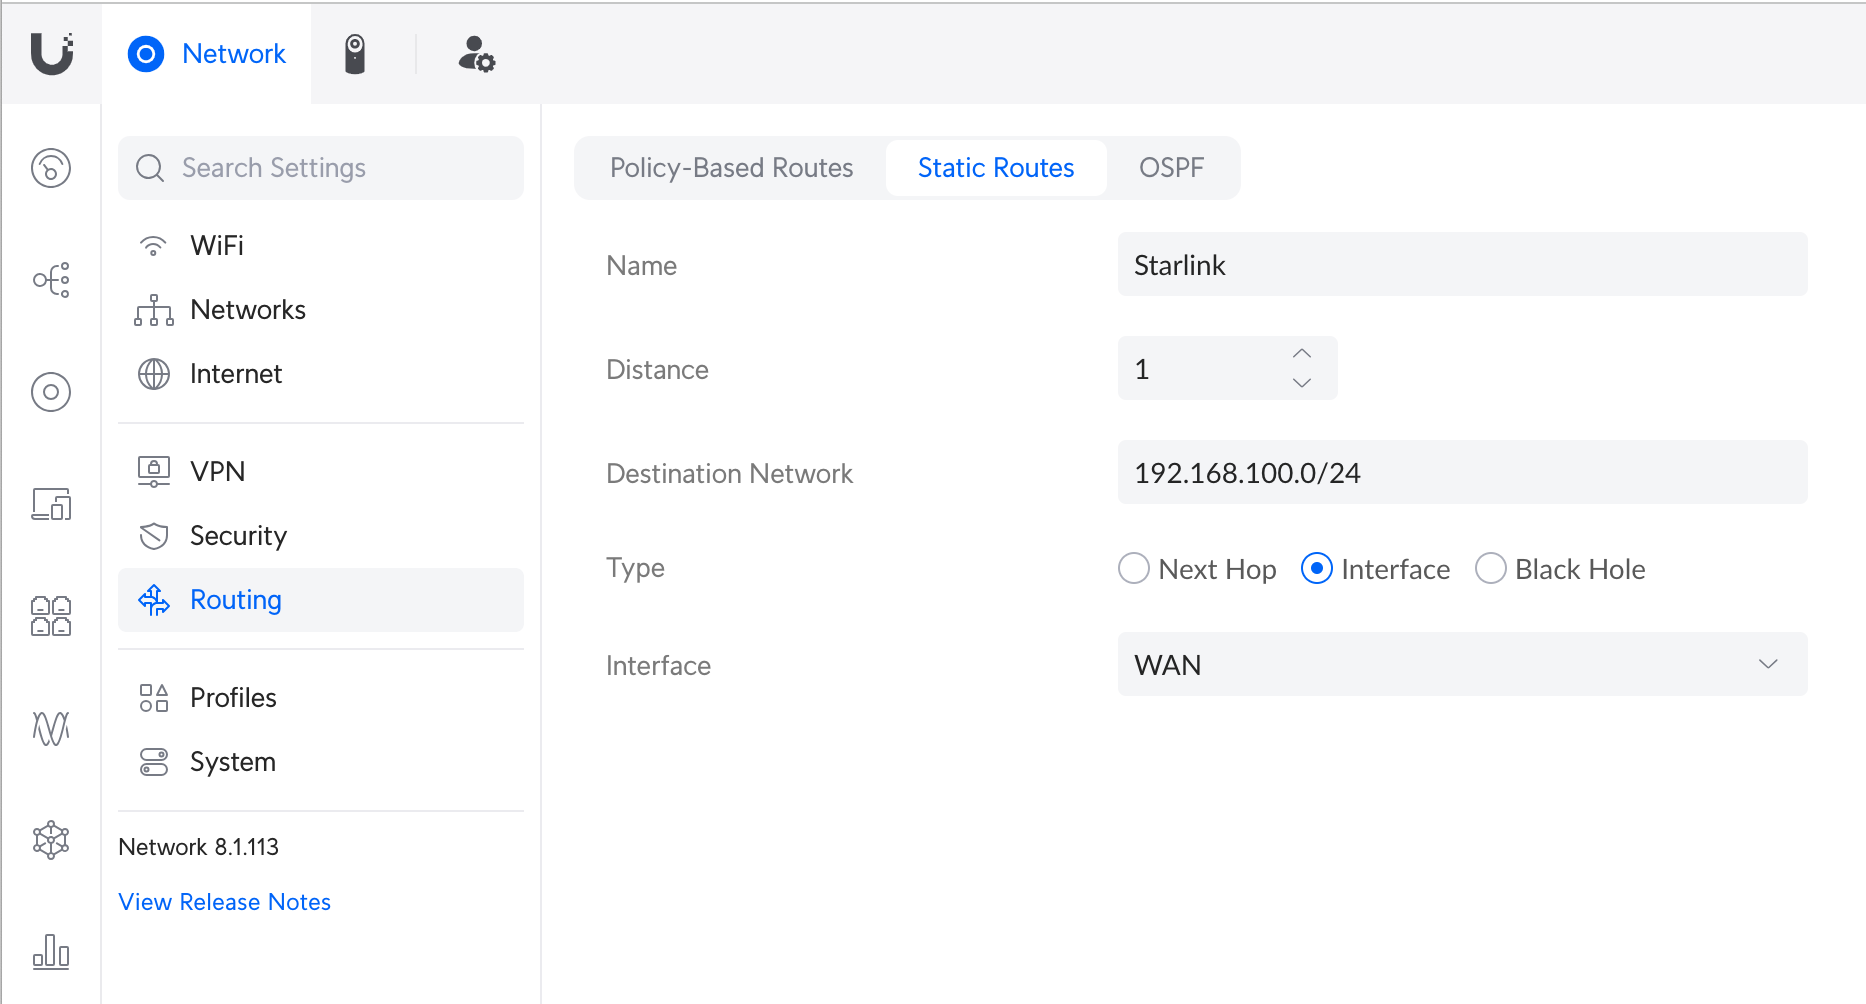
In this case, to be able to connect to it and access its data, it's necessary to define a static route on the router managing the network, in this case my UDM Pro. This is done in the network configuration, routing, then the “Static Routes” tab:
The data should be entered as is, with the address 192.168.100.0/24, which is that of the Starlink router, regardless of the addresses on your network.
This static route will allow Home Assistant to find the Starlink router. You can test that it's working properly by typing the address 192.168.100.1 into your web browser: If everything goes well, you should then access the Starlink page.
Home Assistant Configuration
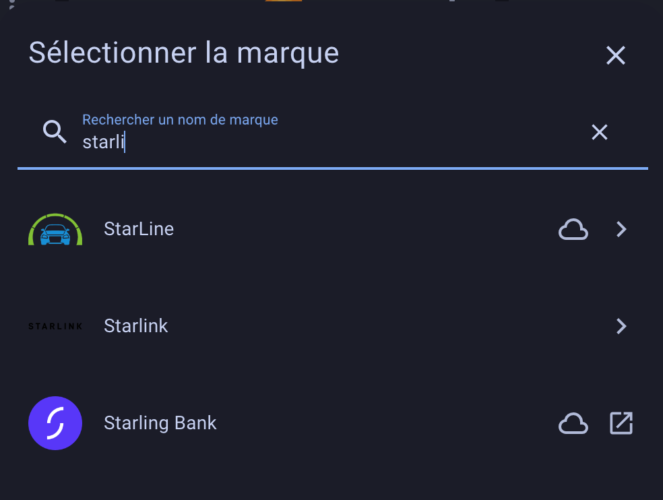
We can now configure the Starlink integration in Home Assistant. To do this, simply go to Settings, Devices and Services, then the “Add Integration” button. There, search for Starlink:
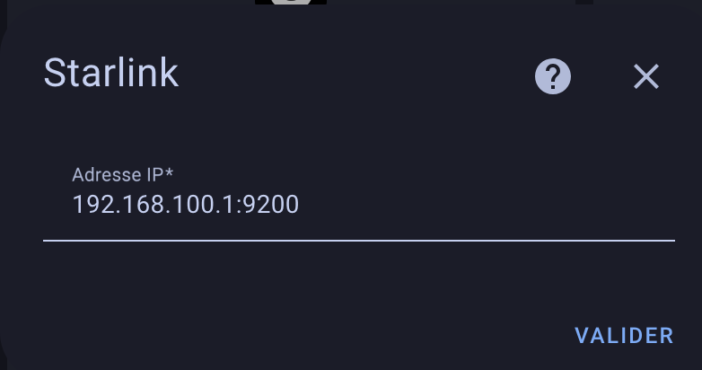
Select it to add it. The system suggests a default IP and port, which we leave as is.
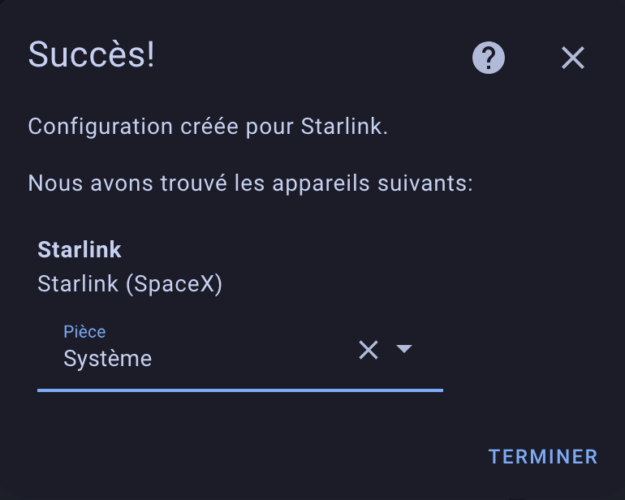
Confirm. The system should confirm the connection is successful. We can then place the integration in the desired room.
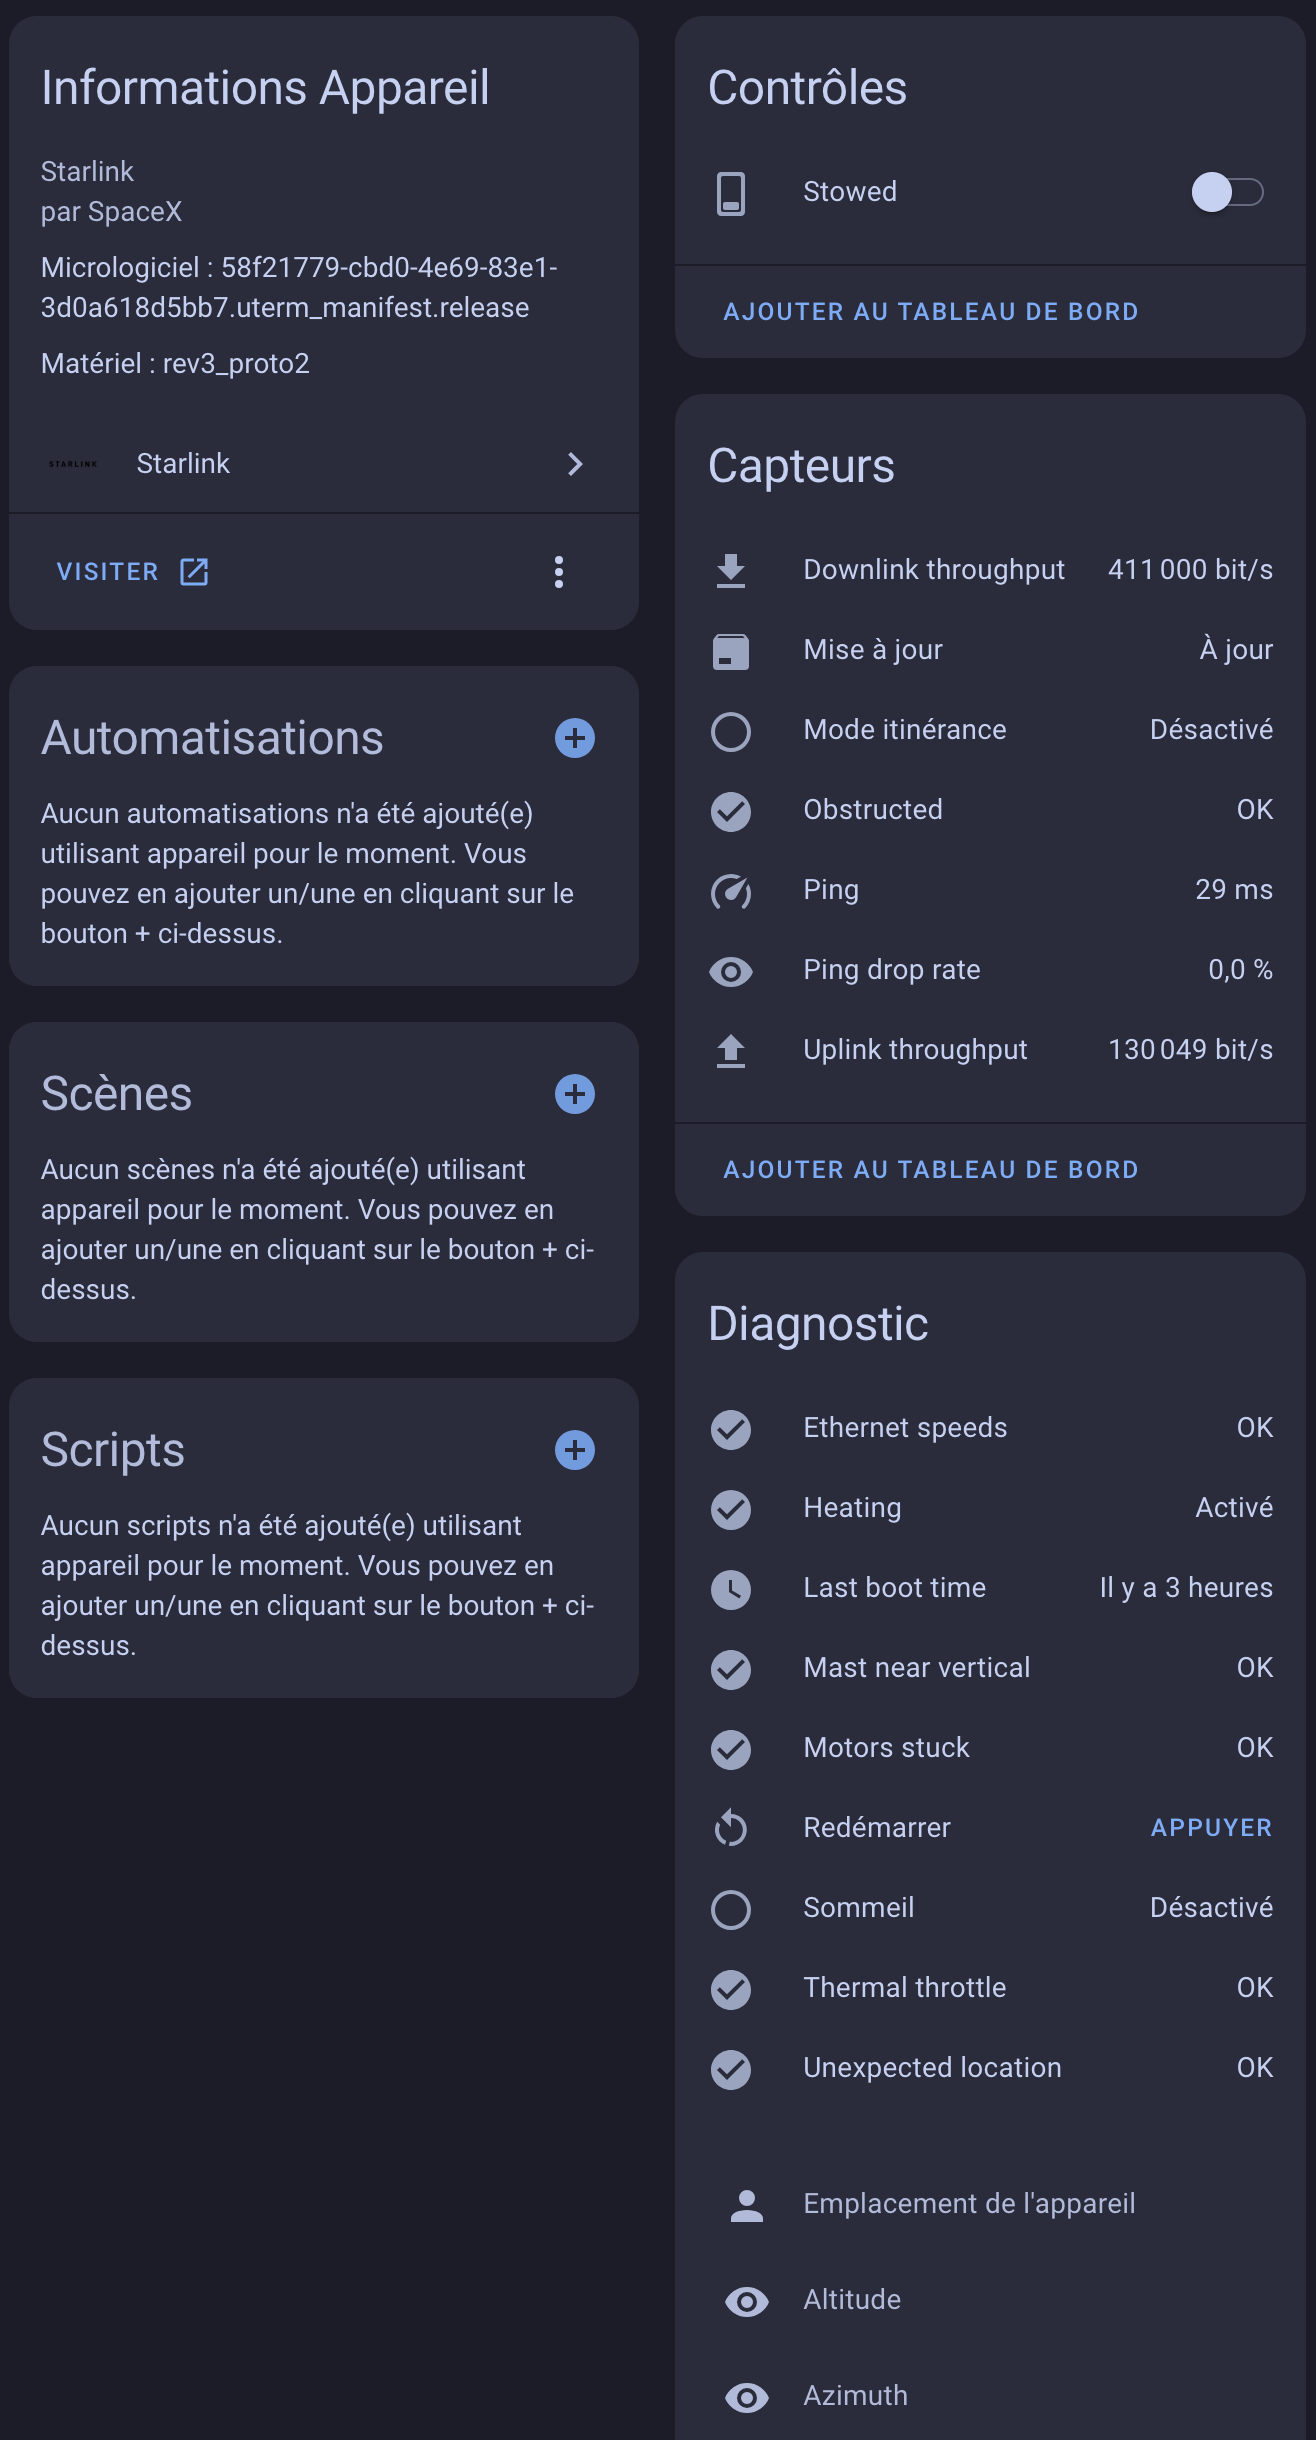
If we go to the integration details, we see all the available information. Explanations for each piece of information are available on the integration page.
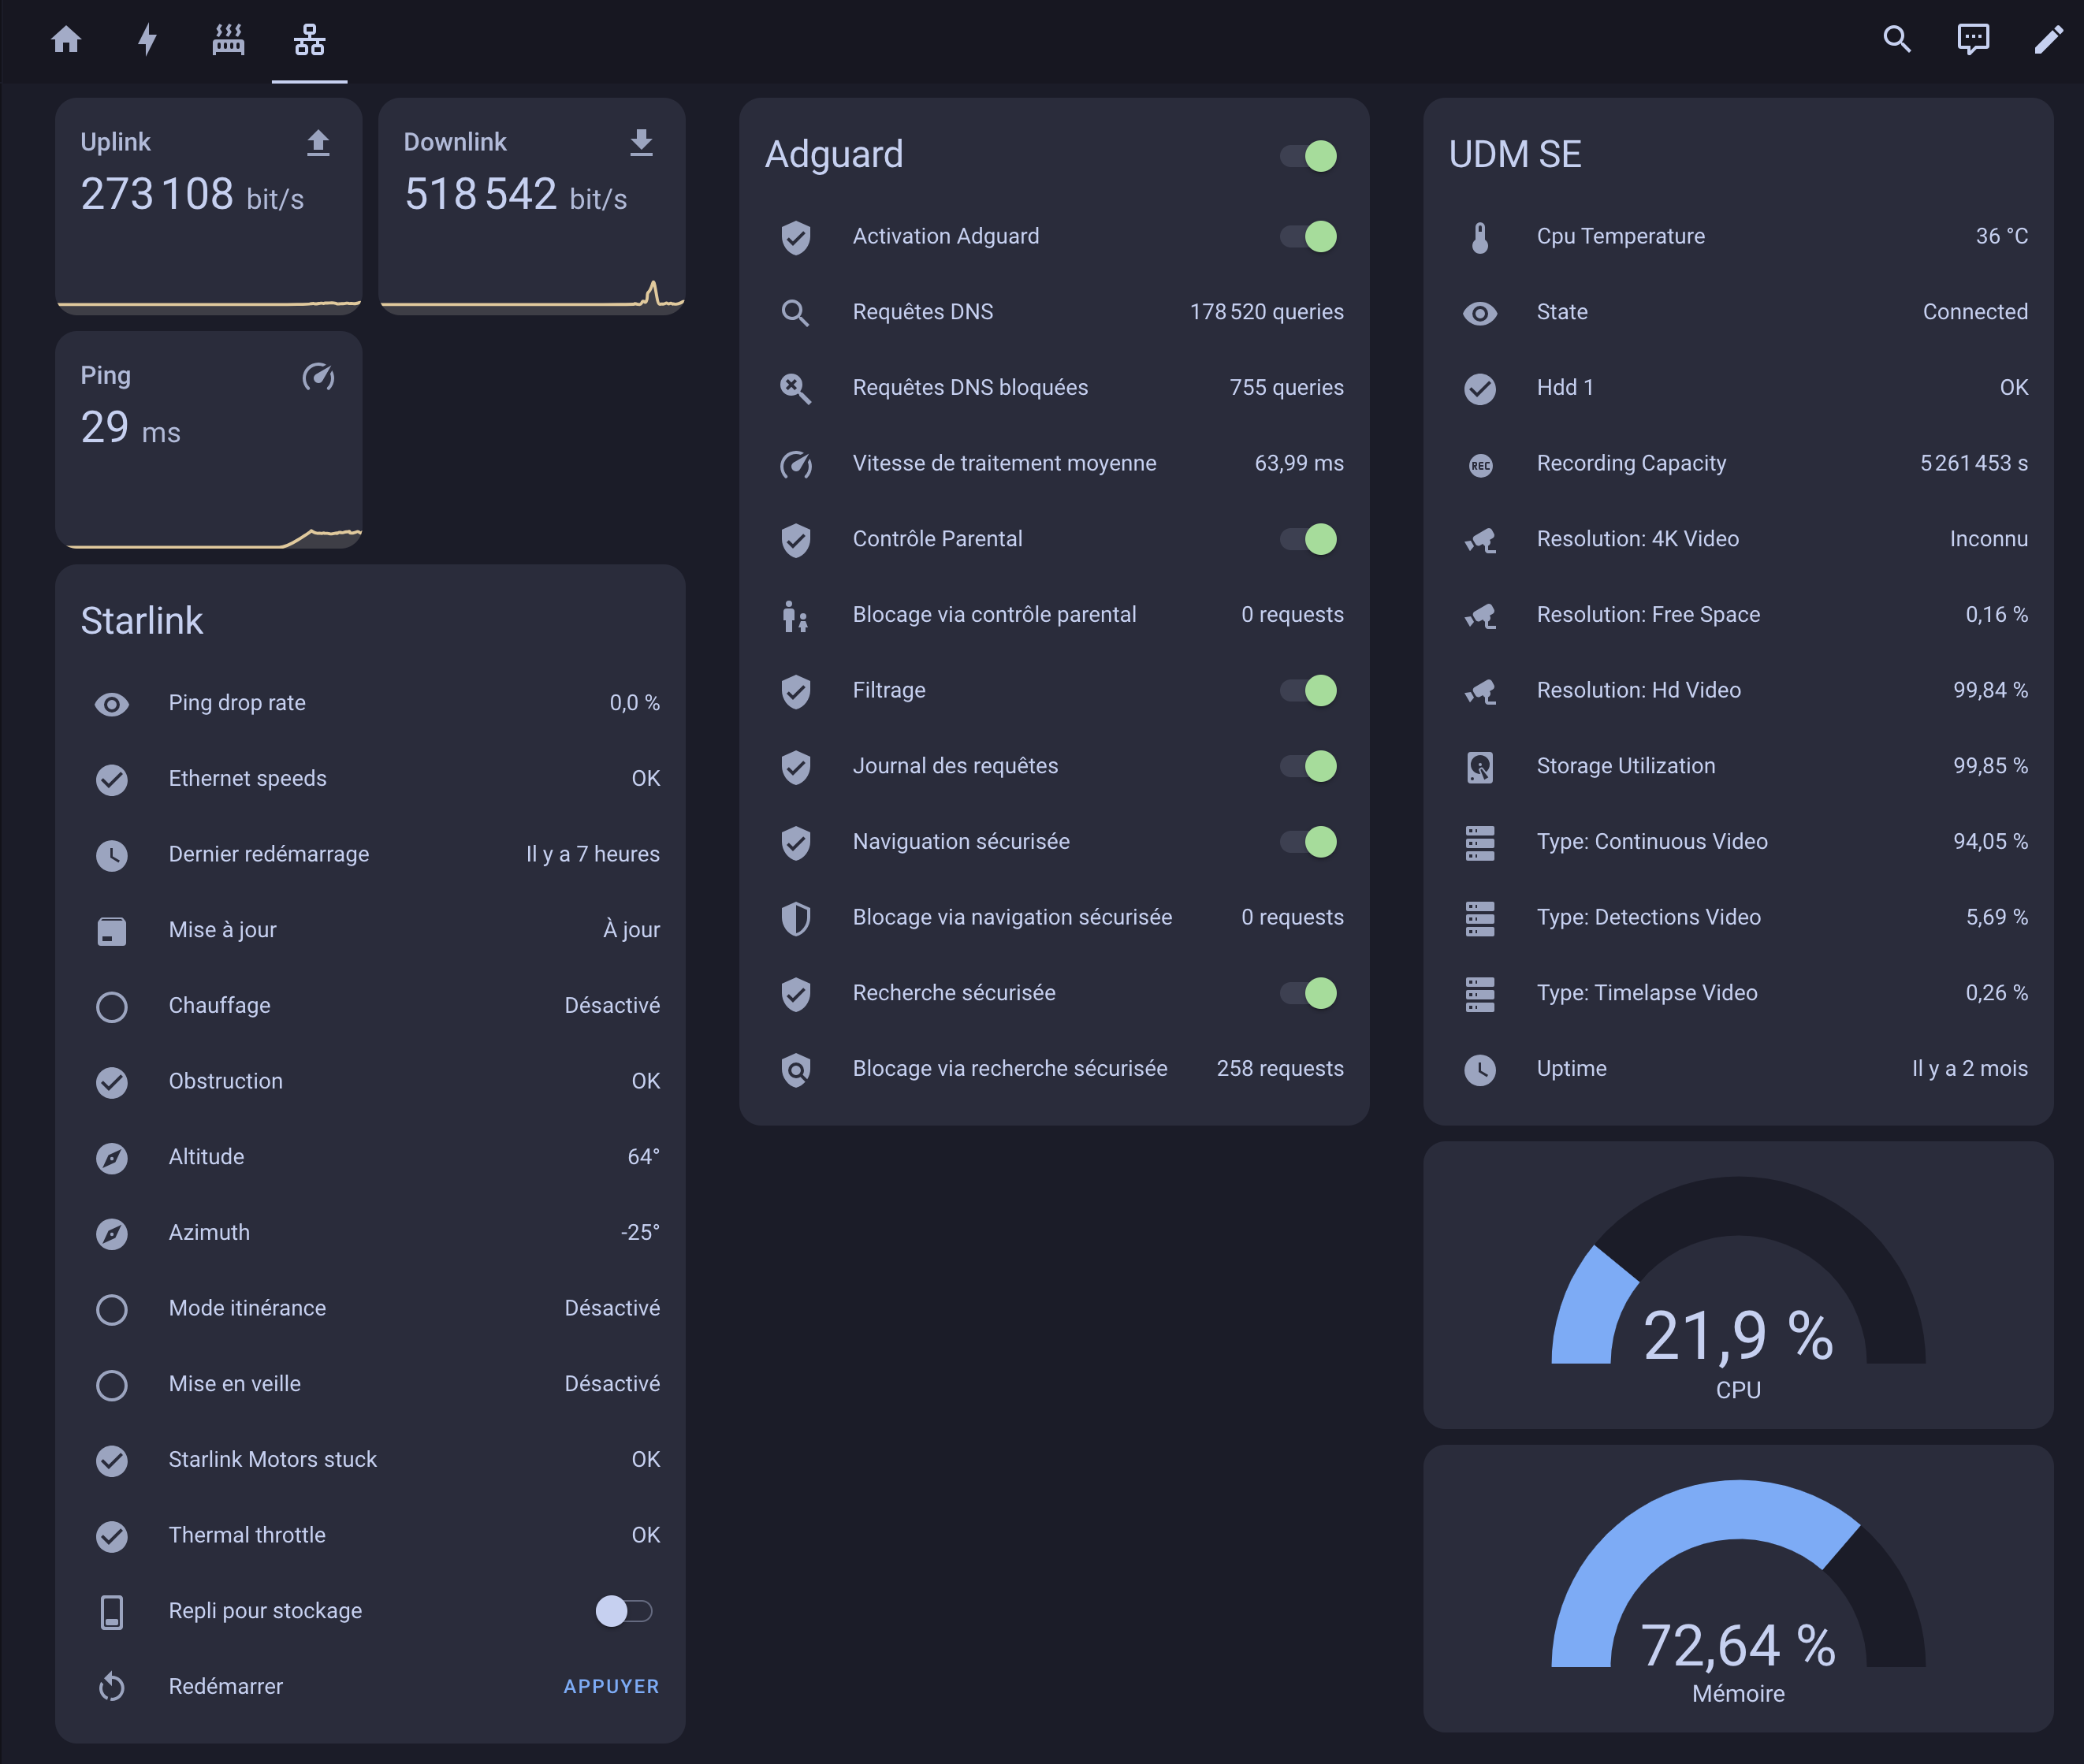
All that's left is to use it as desired. Here, for example, I've displayed various information related to my network on a dedicated dashboard:
This gives us a quick overview of the entire system, with everything grouped in one place. We can then create alerts if we wish to be notified of the slightest network problem. Conclusion
As we've seen, integrating Starlink into Home Assistant is very simple. Aside from the static route that needs to be set on the router if you're using Starlink in bypass mode, the rest is pretty straightforward. But I know some people were struggling with the static route, so I hope this helps!



Please remain courteous: a hello and a thank you cost nothing! We're here to exchange ideas in a constructive way. Trolls will be deleted.