
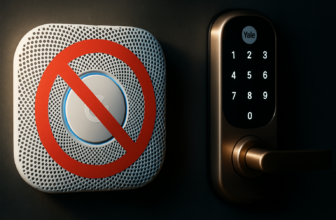
The Nuki Smart Lock is one of my favorite smart home products. It facilitates access to your home while also improving security. The manufacturer has always been committed to making its lock compatible with as many systems as possible, which has led to its widespread adoption in the field. This time, Nuki is expanding the possibilities even further by adding MQTT support. It has always been important to us to connect Nuki to as many smart home systems as possible. With MQTT support now available, we are further expanding the range of possible integrations. MQTT interfaces are very popular with local smart home systems, which are typically managed on their own servers. MQTT is characterized by low power consumption and high reliability. Thanks to the MQTT API, the Nuki Smart Lock 3.0 Pro can be easily integrated into popular systems such as Loxone, OpenHab, and Home Assistant. Martin Pansy, co-founder and CEO of Nuki Home Solutions GmbH MQTT is a widely used communication protocol in home automation, as it is fast, resource-efficient, and relatively easy to set up. Adding MQTT to the lock provides a quick and easy way to integrate the Smart Lock 3.0 Pro into a home automation system (this option is not yet available on the 3.0 model). Popular smart home hubs such as Jeedom, HomeBridge, Home Assistant, or Loxone can now be connected via MQTT. This allows for flexible integration in various application scenarios, from simple status updates to complete home automation integration.
Nuki MQTT and Jeedom
I tested the integration of my Nuki SmartLock 3 Pro into Jeedom using the MQTT Manager plugin available on my
Jeedom Luna
.
You must, of course, have the MQTT manager plugin installed and working. On the configuration page, you enter the username (normally “jeedom”) and password (the part after the “:”): Please note that the current version of MQTT Nuki doesn't seem to support passwords longer than 32 characters (I spent a long time trying to figure out why it wasn't working when I entered the information :p).Next, go to the Nuki mobile app, to the “Functions and Configuration” menu. There, in the “Integrations” section, you can see a new MQTT menu. Click on it and request its activation:
Then enter the IP address of your Jeedom box (which acts as an MQTT broker), your username, and password, and confirm. You can also grant permission to lock or unlock the password using MQTT commands.
 1")
That's all for now. MQTT is now successfully enabled in the Nuki app.
Back in Jeedom, create a new device via the Plugins / Programming / MQTT Manager / Add menu:
 2")
Here, we carefully fill in the “Root Topic” with “nuki”.
 3")
Then, in the “Commands” tab, we create the various commands we want. They are detailed in a PDF manual provided by Nuki.
Some command examples:
 4")
The first part, here “21A80E56C” (for the example), is the lock ID. You will need to retrieve it in the Nuki app, General menu, under “Device ID”. If you have multiple locks that you want to retrieve via MQTT, simply modify this ID in the different commands.
Then add the command “/command”. Example: 21A80E56C/state . This command will retrieve the current status of the lock, identified by a number (see the Nuki manual for the different possible values).This allows you to retrieve the status of the lock, the door, the battery, etc. These are “information” commands for retrieving data.
You can also create “action” commands, with the /lockAction command and the value 1 to unlock or 2 to lock. It then becomes possible to control the lock via Jeedom scenarios if desired.
 5")
Finally, via the Widget menu, you can customize the data display, as displaying “Status: 4” wouldn't be very informative. You can create a widget like this:
The same goes for the door status:
Thanks to the Jeedom community post for the widget idea ;-)
This allows you to create this much more user-friendly widget:
Thanks to MQTT, the Nuki SmartLock 3 is perfectly integrated with Jeedom. And all calls via MQTT are logged in the application's history, in case you have any doubts:
Conclusion
 6")
The arrival of MQTT on the Nuki lock is great news! This eliminates the need for existing plugins for your home automation solution, or for developer support. If your home automation solution supports MQTT, the Nuki lock can be integrated into it! We've seen an example here with Jeedom, but this is also possible with Home Assistant, OpenHab, HomeBridge, or Loxone, which all also support MQTT.
 7")
Already a fan of this lock, this new feature further enhances the appeal!
 8")
 9")


Please remain courteous: a hello and a thank you cost nothing! We're here to exchange ideas in a constructive way. Trolls will be deleted.