With our home automation system controlling the entire house, you feel like Tony Stark in his high-tech tower… until a storm comes and ruins everything. But don't worry, I have the solution for you: a well-integrated inverter into your Home Assistant system! After testing the Eaton Ellipse Pro 650, I decided to whip up a detailed guide to harness the full power of this beast in Home Assistant, which will thus be able to trigger actions accordingly.
Prerequisites
As we saw in its recent test, I therefore have an Eaton Ellipse Pro 650 inverter, installed in my patch panel. This inverter can be connected to a computer to retrieve all its information. But this means having a computer turned on 24/7. Having a Synology NAS, which operates 24/7 (for backups, multimedia distribution throughout the house, etc.), I connected the inverter to the Synology, which manages it very well.
Step 1: Plug it in!
First step, let's get the cables out! Connect your inverter to your Synology NAS via USB. It's not harder than that.
Next, head to the DSM of your Synology. Go to “Control Panel > Hardware & Power > UPS”. Enable UPS support and select “USB UPS”.
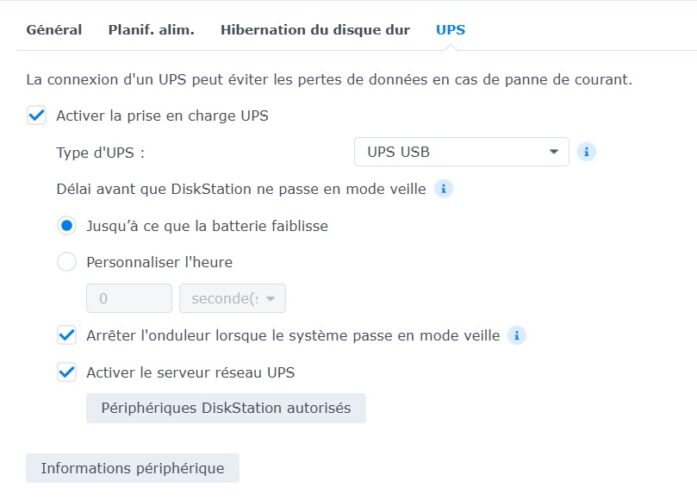
Then check “Enable UPS network server”.
Don't forget to add the IP address of your Home Assistant system in the “Authorized DiskStation Devices”. It's like giving VIP access to your home automation assistant!
Step 2: Configuration in Home Assistant
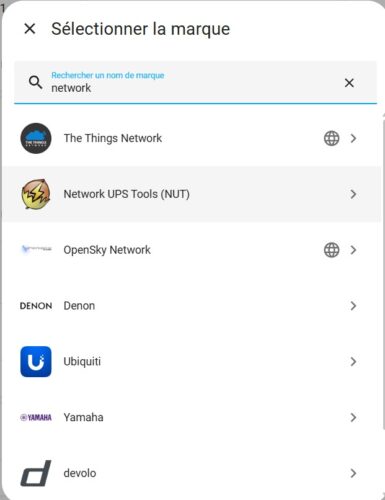
Let's move on to Home Assistant. Go to “Settings > Integrations”, then add the integration “Network UPS Tool“.
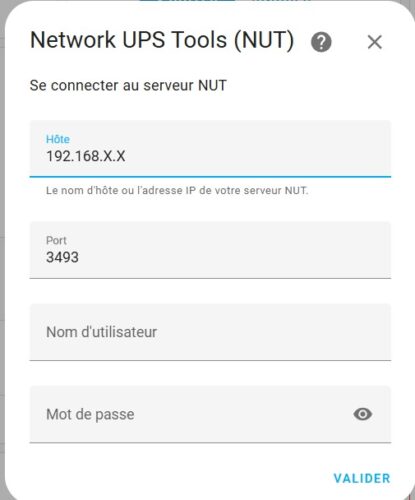
Provide the IP address of your Synology NAS:
And… tadaaa! Your inverter is now under the spotlight of Home Assistant.
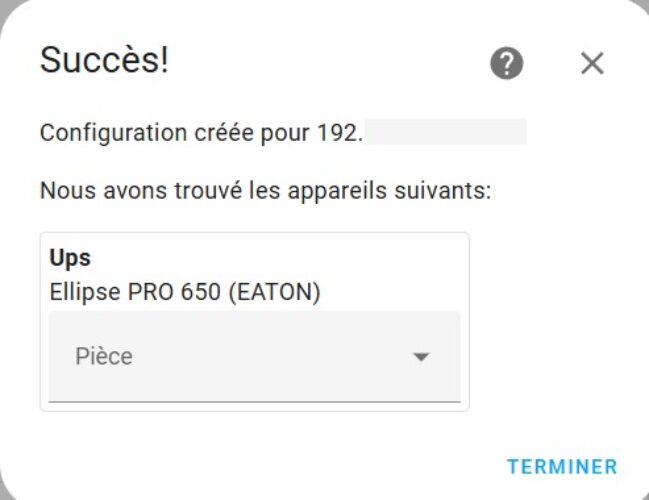
This way, we collect a lot of data from our inverter: charge status, power, autonomy, etc.
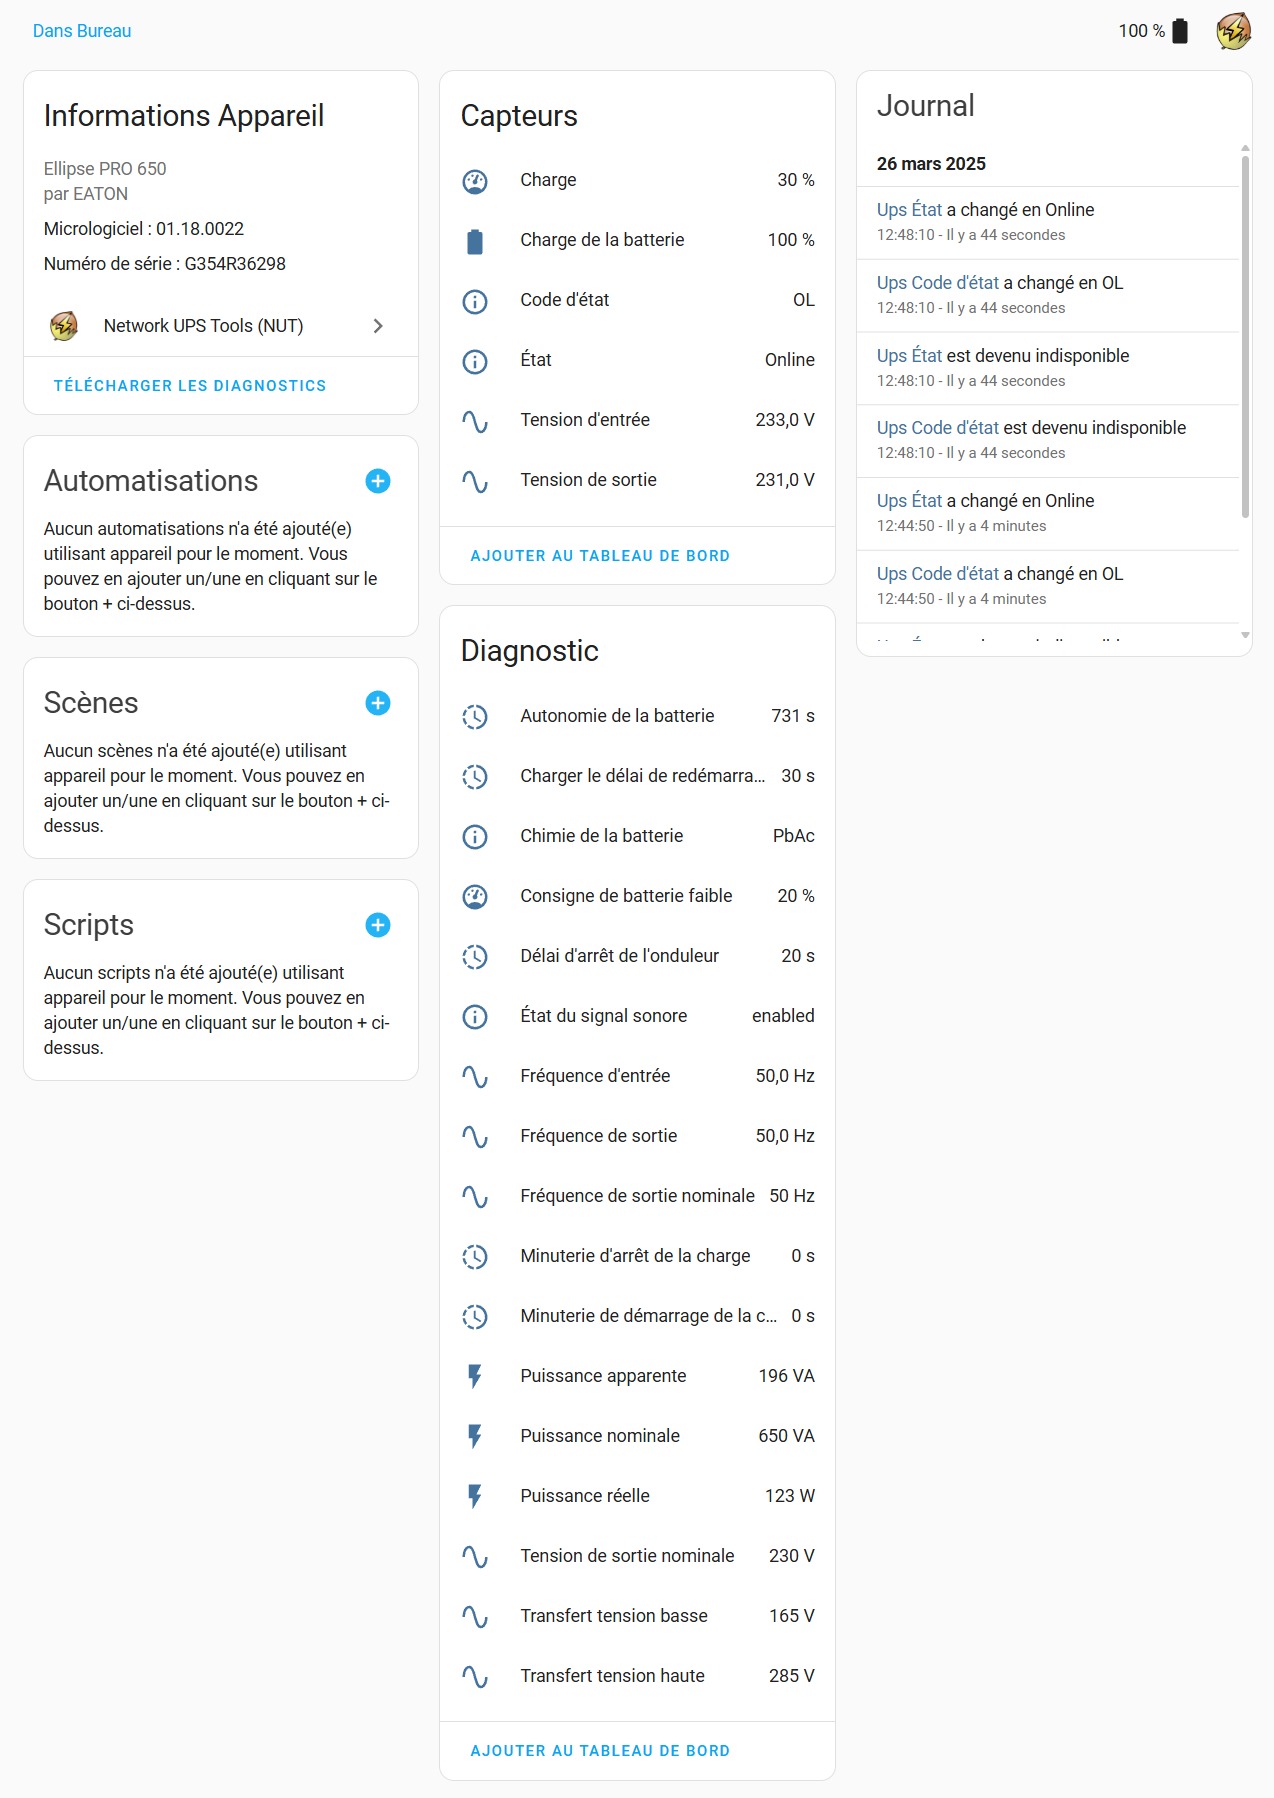
The Infinite Possibilities of Home Assistant
Now that your inverter is integrated, what to do with all this data? Well, let your imagination run wild! It can start with displaying certain information on your dashboard:
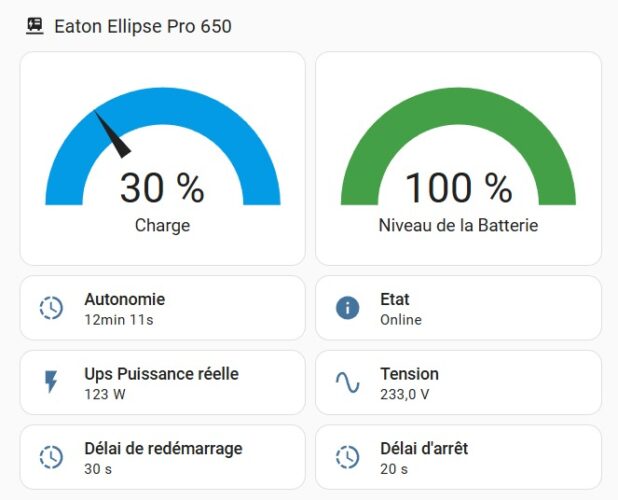
The remaining autonomy will be automatically updated on your dashboard. It's a bit like having a gas gauge for your backup!
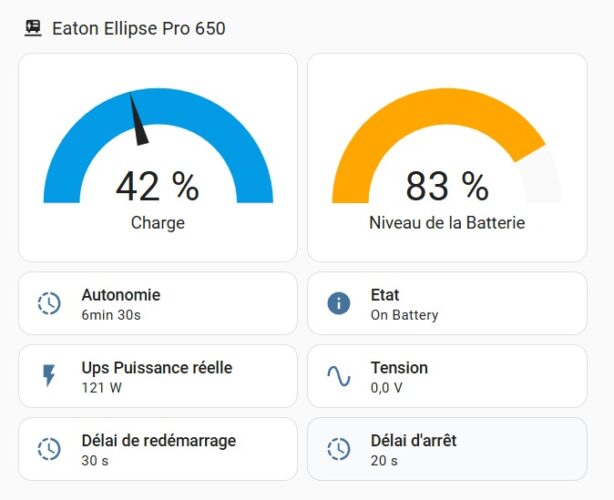
Then, you can for example create notifications in case of a power outage. Imagine: you are peacefully sipping a cocktail on the beach, and boom! Your phone informs you that the power has gone out at home. Convenient, right?
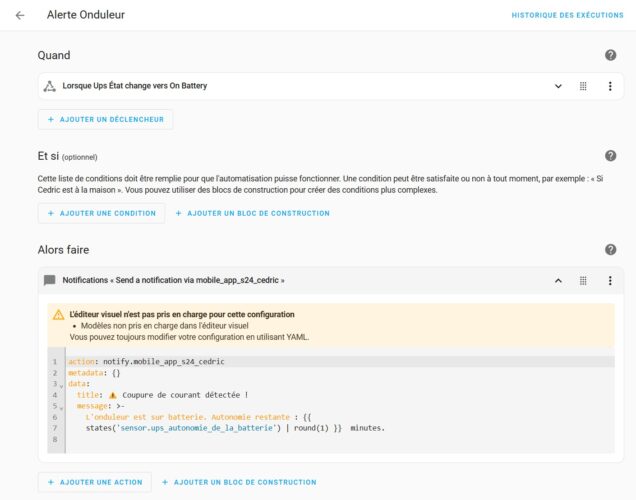
This automation sends me a notification as soon as the power outage occurs:

You can also automate the shutdown of certain devices in case of low battery. No more need to run around like crazy to turn everything off!
Conclusion: Sleep Soundly!
And there you go! Your home automation installation is now informed of the slightest whims of the electrical network. No more panic during storms, no more lost data, no more unexpected reboots of your precious devices.
With this setup, you can sleep soundly (or go on vacation with peace of mind). Your home is now capable of keeping you informed of any electrical fluctuation and reacting accordingly.



Please remain courteous: a hello and a thank you cost nothing! We're here to exchange ideas in a constructive way. Trolls will be deleted.